Fruity Pebbles Rice Crispy Treats
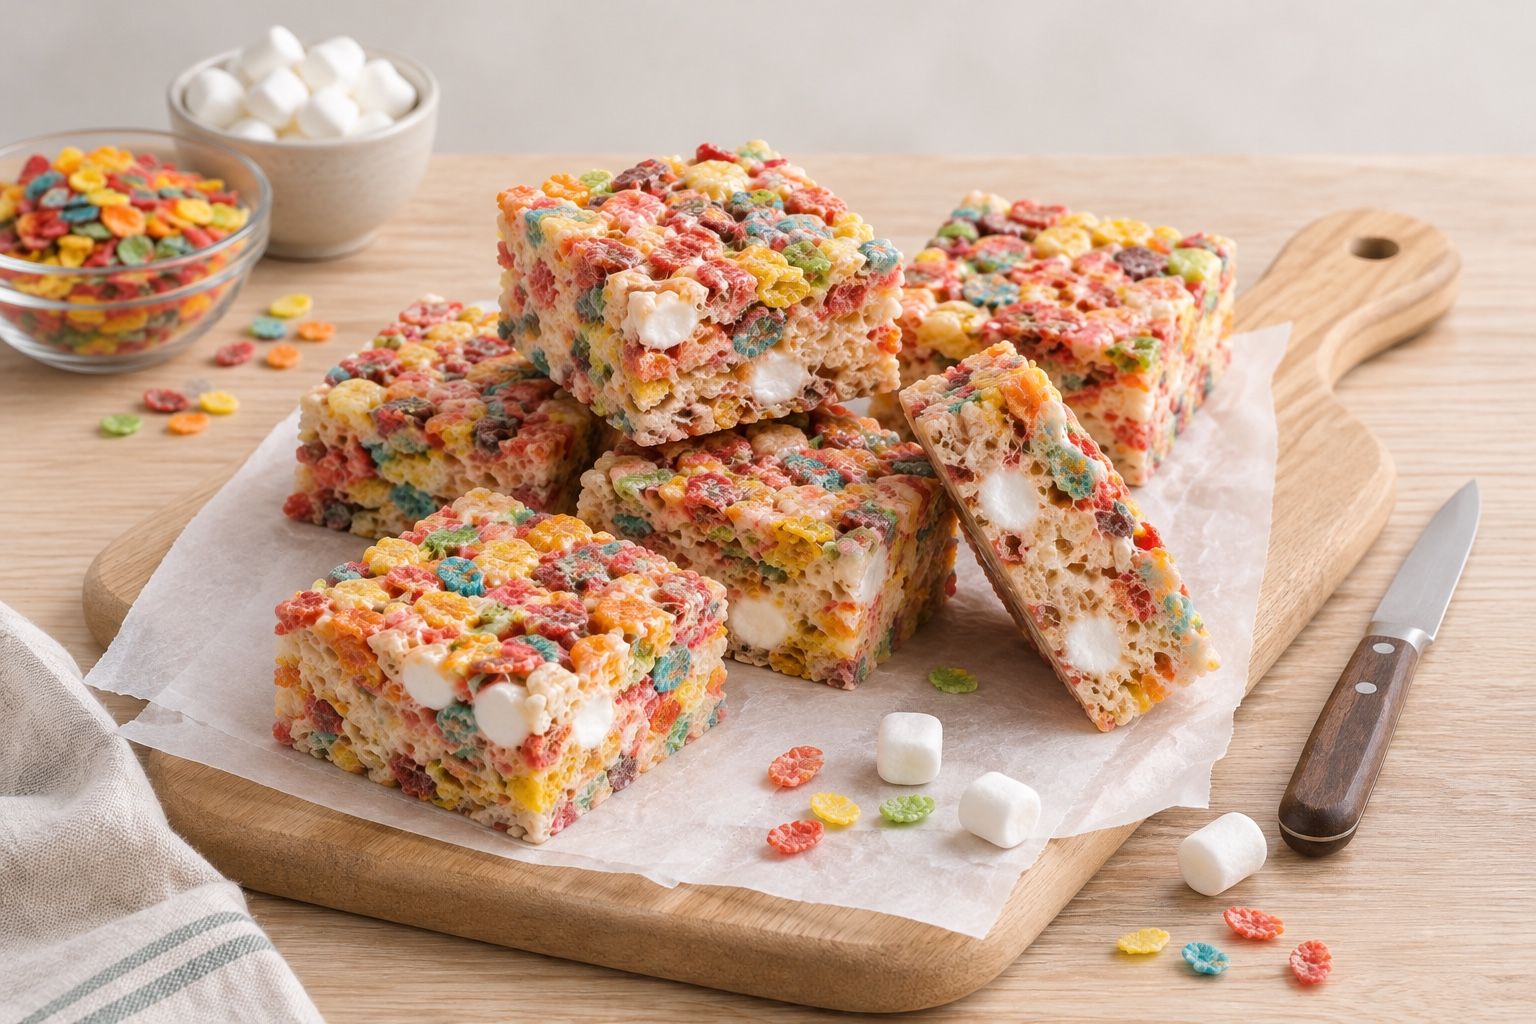
Soft, gooey no-bake bars made with Fruity Pebbles, crisp rice cereal and melted marshmallows, with chewy marshmallow pockets in every bite.

- Prep
- 10 min
- Cook
- 10 min
- Rest
- 30 min
- Total
- 50 min
- Serves
- 12
These Fruity Pebbles rice crispy treats are bright and cheerful, and they take about 20 minutes of hands-on time. Melt butter and marshmallows low and slow on the stove, fold in the cereal, and press it gently into a pan. No oven required.
We love the mix of Fruity Pebbles and plain crisp rice cereal. You still get all that rainbow color, plus a classic snap that keeps the sweetness in check. A handful of whole marshmallows folded in at the end leaves soft, chewy pockets throughout.
The real secret is gentle handling. Keep the heat low, fold instead of stirring hard, and press lightly so the bars stay tender. They're a sweet pick for bake sales, birthday parties or a busy weeknight treat.
How We Developed This Recipe
- The five versions we compared agree on the basics: melt butter and marshmallows low and slow, stir in vanilla and salt off the heat, then press the cereal mixture gently into a lined pan. They differ on butter (4 tablespoons up to a full stick), pan size (9x9 or 9x13), and whether to use Fruity Pebbles alone or cut them with plain crisp rice cereal. We went with a full 16-ounce bag of marshmallows, 6 tablespoons of butter and 8 cups of cereal in a 9x13 pan because that ratio gives soft, gooey bars that still hold a clean edge. We also mixed in some crisp rice cereal and saved a handful of whole marshmallows to fold in, which keeps the color bright while adding crunch and chewy pockets.
Why You’ll Love It
- Bright, rainbow-speckled bars with a soft, gooey center and crisp edges
- Ready in about 20 minutes of hands-on time, no oven needed
- A mix of Fruity Pebbles and crisp rice cereal keeps the color bold without being overly sweet
- Reserved whole marshmallows add extra chewy pockets in every bite
Ingredient Notes & Swaps
- Mini marshmallows
- Fresh marshmallows melt smoother and stay softer once the bars set. An older, dried-out bag can melt grainy and make the treats firm. Mini marshmallows also melt faster and more evenly than large ones.
- Fruity Pebbles
- This is where all the color and fruity flavor comes from. Measure it loosely, without packing the cup, so the bars don't end up dry.
- Crisp rice cereal
- Plain crisp rice cereal adds that classic snap and balances the sweetness of the Fruity Pebbles. You can swap it for more Fruity Pebbles if you want an all-rainbow bar.
- Butter
- We use unsalted butter plus a measured pinch of salt so we can control the seasoning. If you only have salted butter, use it and skip the added salt.
- Vanilla and salt
- A small amount of each rounds out the marshmallow sweetness and makes the fruity flavor taste brighter.
Tips for Success
- Hard bars usually come from melting marshmallows over heat that is too high or cooking them too long. Keep the burner on low and take the pot off as soon as the mixture is smooth.
- Packing the mixture firmly into the pan is the other common cause of tough treats. Press just enough to fill the corners and level the top.
- Grease everything that touches the mixture, including your spatula, knife and hands, so it doesn't stick.
- Use a big pot. Eight cups of cereal needs plenty of room to fold without spilling over the sides.
- If you prefer thicker bars, press the mixture into a 9x9-inch pan instead and cut into 9 larger squares.
Variations
- All-Fruity Pebbles: Use 8 cups of Fruity Pebbles and skip the crisp rice cereal for the boldest color and fruitiest flavor.
- Cocoa swap: Use Cocoa Pebbles in place of the Fruity Pebbles for a chocolate version.
- White chocolate drizzle: Melt 1/2 cup white chocolate chips and drizzle over the set bars before cutting.
- Brown butter: Let the butter cook over medium-low heat until golden and nutty-smelling before turning the heat to low and adding the marshmallows.
Storage & Reheating
- Room temperature
- Store the cut bars in an airtight container at room temperature for up to 3 days. Layer them between sheets of parchment so they don't stick together.
- Fridge
- We don't recommend refrigerating them, since the cold makes the marshmallow firm and the bars chewy-hard.
- Freezer
- Wrap bars individually in plastic wrap, place in a freezer bag and freeze for up to 6 weeks. Thaw at room temperature for about 30 minutes before eating.
Frequently Asked Questions
Can I use only Fruity Pebbles, or should I mix them with Rice Krispies?
Either works. All Fruity Pebbles gives the brightest color and strongest fruity flavor, while mixing in some crisp rice cereal adds crunch and tones down the sweetness a bit.
Why did my Fruity Pebbles rice crispy treats turn out hard?
The usual culprits are melting the marshmallows over too-high heat, cooking them too long, or packing the mixture too tightly into the pan. Low heat, a quick fold and gentle pressing keep them soft.
Can I use large marshmallows instead of mini marshmallows?
Yes, use the same weight (16 ounces) of large marshmallows, but expect them to take a few extra minutes to melt. Stir often over low heat, and fold in a few chopped large marshmallows at the end in place of the reserved minis.
How long should the treats cool before I cut them?
Give them 30 to 60 minutes at room temperature, until they feel firm and are no longer warm. Cutting too early makes the bars squish and lose their shape.
Can I freeze Fruity Pebbles rice crispy treats?
Yes. Wrap the bars individually, freeze in a freezer bag for up to 6 weeks, and let them thaw at room temperature for about 30 minutes.
Recipe
Fruity Pebbles Rice Crispy Treats
Prep 10 minCook 10 minRest 30 minTotal 50 minYield 12 bars
Ingredients
Equipment9x13-inch baking pan · Parchment paper · Large pot or Dutch oven · Silicone spatula · Large mixing bowl · Sharp knife
Instructions
- Prepare the panLightly grease a 9x13-inch baking pan with cooking spray. Line it with a piece of parchment paper that hangs over the two long sides, then spray the parchment too. Measure out the cereals into one large bowl and set aside 1 1/2 cups of the marshmallows.Tip: The parchment overhang works like handles, so you can lift the whole slab out for neat cutting.
- Melt the butterAdd the butter to a large pot or Dutch oven over low heat. Stir until it is completely melted and just starting to foam, about 2 minutes.Tip: Keep the heat low. Browned butter tastes nice, but hot butter can scorch the marshmallows in the next step.
- Melt the marshmallowsAdd the remaining marshmallows (everything except the reserved 1 1/2 cups) to the pot. Stir constantly over low heat until the mixture is completely smooth, glossy and no lumps remain, 4 to 6 minutes.Tip: Rushing this step over higher heat is the main reason these bars turn out hard, so be patient.
- Season off the heatTake the pot off the heat. Stir in the vanilla and salt until evenly mixed into the melted marshmallow.
- Fold in the cerealAdd the Fruity Pebbles and crisp rice cereal to the pot. Fold gently with a greased silicone spatula until every piece is coated. Add the reserved marshmallows and fold a few more times, just until they are scattered through but still mostly whole.Tip: Fold rather than stir hard so the cereal stays crisp and doesn't crush into crumbs.
- Press gently into the panScrape the mixture into the prepared pan. Use a greased spatula or a piece of lightly greased parchment to nudge it into the corners and smooth the top into an even layer. Press only enough to fill the pan; don't pack it down.Tip: Light pressure keeps the bars soft and chewy. Packing them tightly makes them dense and hard to bite.
- Let the treats setLeave the pan on the counter until the bars feel firm to the touch and have cooled to room temperature, 30 to 60 minutes.Tip: Skip the fridge for setting. Cold air firms marshmallow quickly and can leave the bars stiff.
- Cut into squaresLift the slab out of the pan using the parchment handles. Cut into 12 squares with a sharp knife lightly greased with cooking spray, wiping and re-spraying the blade as needed.
Notes
- Measure the cereal loosely without packing the cup.
- If using salted butter, leave out the 1/4 teaspoon of added salt.
- For a 9x9-inch pan, the bars will be noticeably thicker, about 1.5 times as thick; cut into 9 squares and allow the full hour to set.
Nutrition (per serving, estimated)
- Calories
- 265
- Protein
- 1 g
- Carbs
- 50 g
- Fat
- 7 g
Saturated fat 4 g · Fiber 0 g · Sugar 28 g · Sodium 210 mg · Cholesterol 15 mg

About the author
Caroline Webb
Caroline Webb writes desserts and baking: cookies, quick breads, bars and no-bake treats. Her recipes explain why each step matters and how to tell when a bake is done.
More recipes by Caroline