Easy Fudge Recipe with Sweetened Condensed Milk
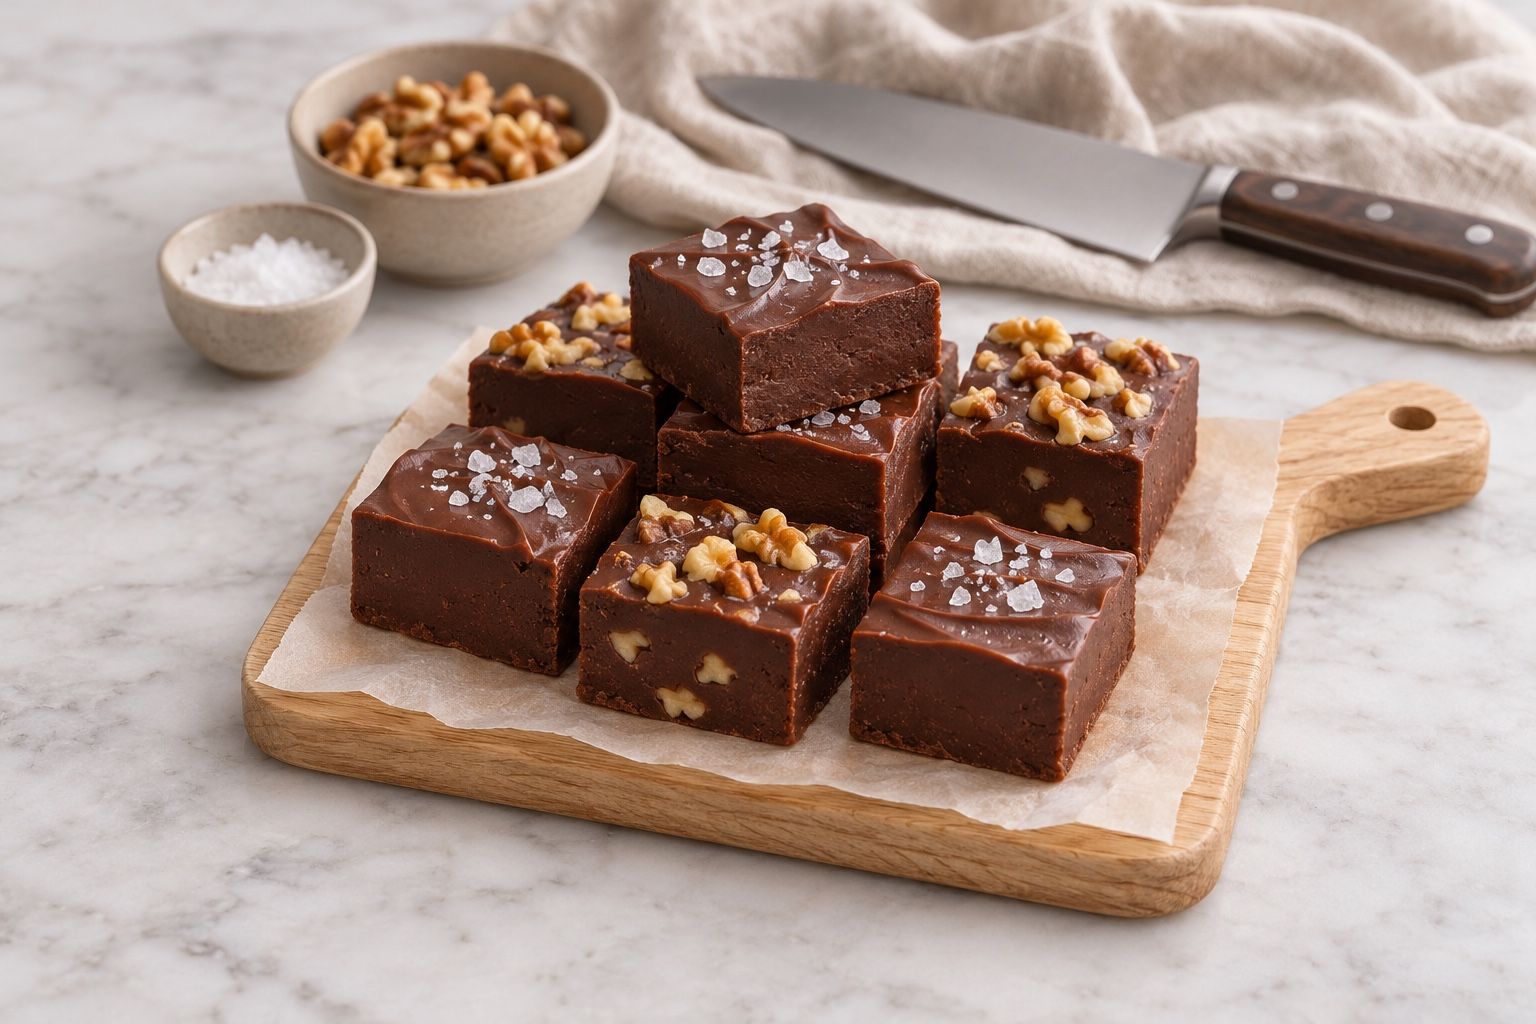
Rich, creamy chocolate fudge made with chips, sweetened condensed milk and butter. No candy thermometer and 15 minutes of work, then chill and slice.

- Prep
- 5 min
- Cook
- 10 min
- Chill
- 2 hr
- Total
- 2 hr 15 min
- Serves
- 24
When you want a homemade treat without the fuss, this easy fudge recipe is the one we reach for. Chocolate chips, sweetened condensed milk and a little butter melt together over low heat into a thick, glossy mixture. There's no candy thermometer and no tricky sugar syrup to worry about.
The hands-on part takes about 15 minutes, and then the fridge does the rest. You end up with 24 rich, creamy pieces that slice cleanly and hold their shape on a platter or in a gift tin.
We love a sprinkle of flaky sea salt on top, and toasted walnuts or pecans add a nice crunch if you want it.
How We Developed This Recipe
- The five versions we compared agree on the core formula: one 14-ounce can of sweetened condensed milk melted with chocolate, then poured into a lined pan and left to set. They differ on how much chocolate to use (roughly 2 to 4 cups, or about 12 to 24 ounces), whether to melt it in the microwave or on the stove, and whether to set the fudge in the fridge or on the counter. We went with 3 cups of chocolate chips for thick, sliceable pieces in an 8-inch pan, plus a little butter for a silkier bite. We chose very low stovetop heat because it gives you the most control, and we include microwave directions in the FAQs.
Why You’ll Love It
- Just five basic ingredients, plus optional nuts
- No candy thermometer needed
- About 15 minutes of hands-on time before it sets
- Makes 24 rich, creamy pieces for gifting or sharing
Ingredient Notes & Swaps
- Semisweet chocolate chips
- Semisweet chips give a classic, balanced fudge flavor. You can swap in bittersweet for a darker taste or use half milk chocolate for a sweeter one. If your fudge comes out too soft, try a chip brand where chocolate, not sugar, is listed first.
- Sweetened condensed milk
- This is the thick, sweet canned milk that makes this fudge foolproof. Do not use evaporated milk. It has no added sugar and is much thinner, so the fudge won't set.
- Butter
- A couple tablespoons of butter makes the fudge smoother and glossier. Salted or unsalted both work. If you use salted, cut the added salt to a small pinch.
- Vanilla and salt
- These are small amounts, but they matter. Vanilla rounds out the chocolate, and a little salt keeps the fudge from tasting flat or overly sweet.
- Walnuts or pecans
- These are optional, but we love the crunch they add. Toast them for a few minutes in a dry skillet for deeper flavor, then let them cool before stirring them in.
Tips for Success
- Keep the heat low. Scorched chocolate turns thick, dull and gritty, so stir constantly and take the pan off the burner as soon as everything is smooth.
- Double-check the can before you open it. Evaporated milk sits right next to sweetened condensed milk on the shelf, and it will leave you with fudge that never sets.
- Keep water away from the chocolate. Use a dry pan and spatula, and don't cover the warm fudge while it cools, since condensation can drip back in.
- For clean squares, let cold fudge sit at room temperature for about 10 minutes before cutting so it doesn't crack.
- If your fudge is still soft after chilling, give it a few more hours in the fridge. Very sugary chocolate chips can make a softer fudge, so try another brand next time.
Variations
- Rocky road fudge: Let the mixture cool for a few minutes, then fold in 1 cup mini marshmallows along with the nuts.
- Peanut butter swirl: Dollop 1/3 cup warmed creamy peanut butter over the fudge in the pan and swirl with a knife.
- Mint chocolate fudge: Swap the vanilla for 1/2 teaspoon peppermint extract and top with crushed peppermint candies.
- Milk chocolate fudge: Use half milk chocolate chips and half semisweet for a sweeter, creamier flavor.
Storage & Reheating
- Room temperature
- Store in an airtight container with parchment between layers for up to 1 week in a cool spot.
- Fridge
- Keep in an airtight container for up to 2 to 3 weeks. Let it sit out for 10 to 15 minutes before serving for the creamiest texture.
- Freezer
- Wrap the pieces or the whole block tightly in plastic wrap, then place in a freezer bag for up to 3 months. Thaw overnight in the fridge before serving.
Frequently Asked Questions
Can I make fudge without a candy thermometer?
Yes. This fudge uses sweetened condensed milk, so there's no sugar syrup to cook to a set temperature. You just melt everything together until smooth.
Can I use evaporated milk instead of sweetened condensed milk in fudge?
No. Evaporated milk has no added sugar and is much thinner, so the fudge won't set. Sweetened condensed milk is what gives this recipe its thick, creamy body.
Can I make fudge in the microwave?
Yes. Microwave the chocolate chips, condensed milk and butter in a large microwave-safe bowl for 1 minute, stir, then heat in 20-second bursts, stirring after each, until smooth. Stir in the vanilla and salt and continue with the recipe.
Why is my fudge grainy?
Grainy fudge usually comes from overheating the chocolate, getting a little water in it, or stirring too much after it's smooth. Melt it over low heat with dry tools and stop stirring once it's glossy.
How long does fudge take to set?
Plan on at least 2 hours in the fridge, or 3 to 4 hours at room temperature. Adding mix-ins can make it take a little longer.
Recipe
Easy Fudge Recipe with Sweetened Condensed Milk
Prep 5 minCook 10 minChill 2 hrTotal 2 hr 15 minYield 24 pieces
Ingredients
Equipment8x8-inch baking pan · Parchment paper · Heavy-bottomed saucepan · Silicone spatula · Large sharp knife
Instructions
- Line the panLine an 8x8-inch baking pan with parchment paper, letting extra hang over two opposite sides. Those flaps become handles for lifting out the fudge later.Tip: A tiny dab of butter in the pan helps the parchment stay put.
- Combine in a saucepanAdd the chocolate chips, sweetened condensed milk and butter to a heavy-bottomed saucepan. Make sure the pan and spatula are completely dry, since even a few drops of water can make chocolate seize.
- Melt low and slowSet the pan over low heat and stir constantly with a silicone spatula, scraping the bottom and corners. In about 4 to 6 minutes the mixture will turn smooth, thick and glossy with no visible bits of chips.Tip: If it starts to look clumpy or sticks to the bottom, pull the pan off the heat for 30 seconds and keep stirring.
- Stir in vanilla and saltTake the pan off the heat right away. Add the vanilla and fine salt, then gently fold until just combined and shiny.Tip: Don't keep stirring once it's smooth. Overworking can make the texture grainy.
- Add the nutsIf using nuts, fold them in now while the fudge is still warm and loose.
- Spread into the panScrape the fudge into the lined pan and spread it into an even layer, pushing it into the corners. Sprinkle with flaky sea salt or a few extra chopped nuts, if you like, and press them lightly so they stick.
- Chill until firmRefrigerate uncovered for at least 2 hours, until the fudge is firm all the way through and no longer soft in the center when you press it.Tip: You can also let it set at room temperature for 3 to 4 hours if you have the time.
- Cut into piecesLift the fudge out by the parchment and set it on a cutting board. Use a large sharp knife to cut 6 rows one way and 4 rows the other for 24 pieces, wiping the blade clean between cuts.Tip: Run the knife under hot water and dry it well for the neatest edges.
Notes
- Each piece is about 1 1/3 by 2 inches. For smaller bite-size squares, cut 6 rows each way to make 36 pieces.
- Nutrition estimates are based on 24 pieces without the optional nuts.
Nutrition (per serving, estimated)
- Calories
- 175
- Protein
- 2.2 g
- Carbs
- 22 g
- Fat
- 8.8 g
Saturated fat 5.2 g · Fiber 1.2 g · Sugar 20 g · Sodium 50 mg · Cholesterol 8 mg

About the author
Caroline Webb
Caroline Webb writes desserts and baking: cookies, quick breads, bars and no-bake treats. Her recipes explain why each step matters and how to tell when a bake is done.
More recipes by Caroline